Google SAML SSO Setup Example
You can set up Label Studio to use Google’s IdP for SSO.
You will need the following permissions:
- Access to the Google Admin console. Your account must have super administrator privileges.
- Your Label Studio user role must be Owner or Administrator.
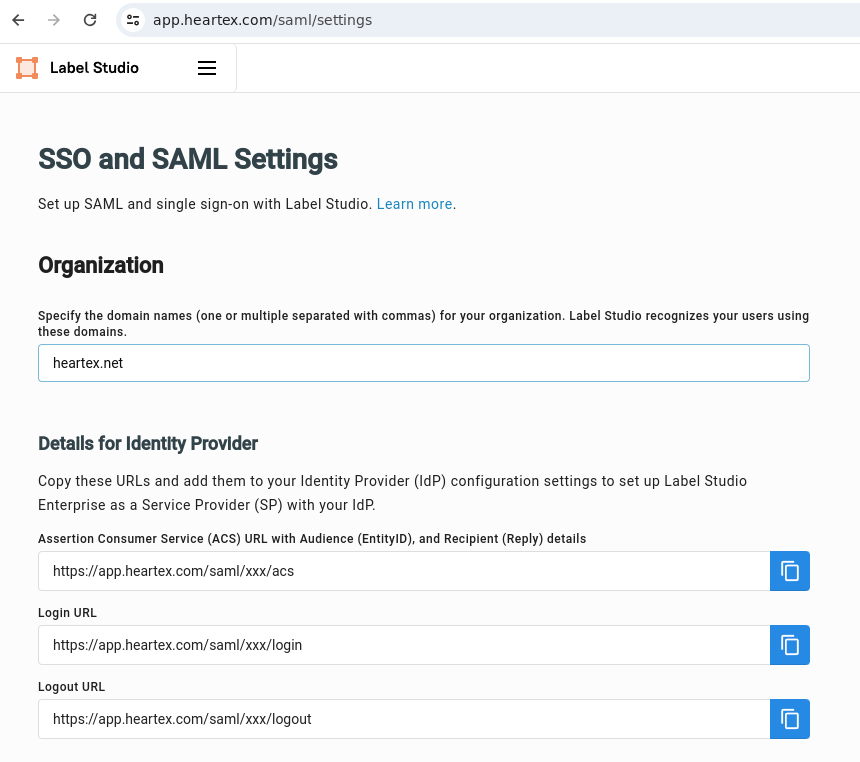
Step 1: Get Label Studio ACS endpoints as a Service Provider (SP)
Access Label Studio SSO settings:
- Log in to Label Studio with an account that has the Owner or Administrator role.
- Click the menu in the upper left and select Organization.
- Select SSO & SAML in the upper right.
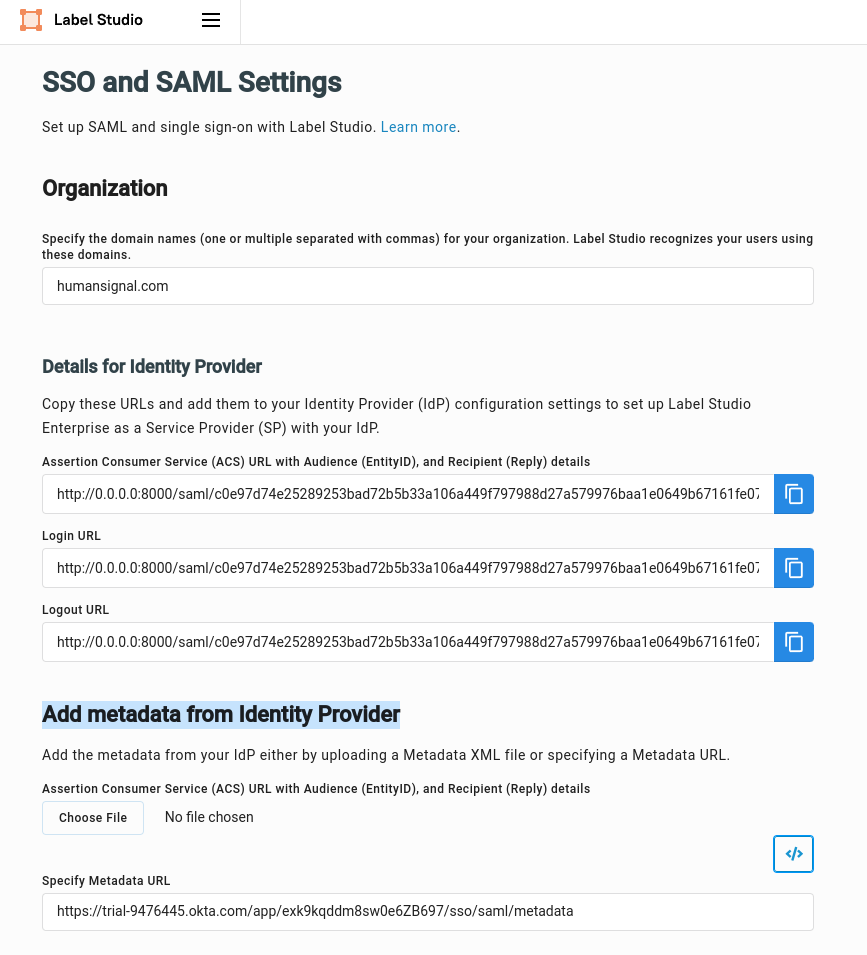
Copy SAML configuration
- From the Details for Identity Provider section, copy the following URLs:
- Assertion Consumer Service (ACS) URL
- Login URL
- Logout URL
- From the Details for Identity Provider section, copy the following URLs:
Step 2: Configure Google Groups and Users
Access Google Admin Console:
- Log in to the Google Admin console.
- Go to Directory > Groups.
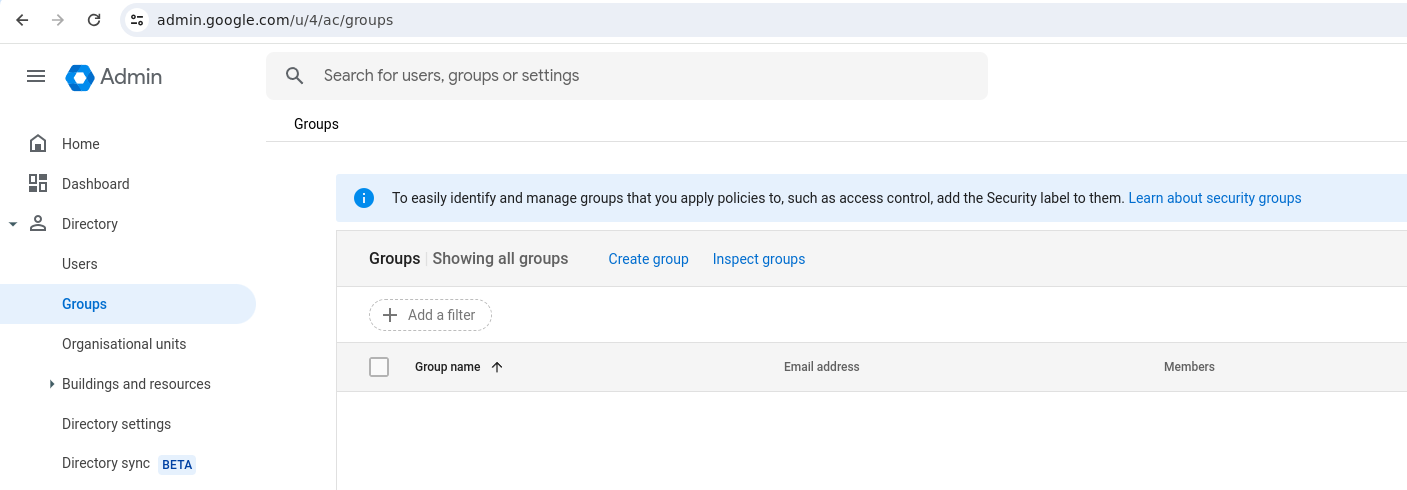
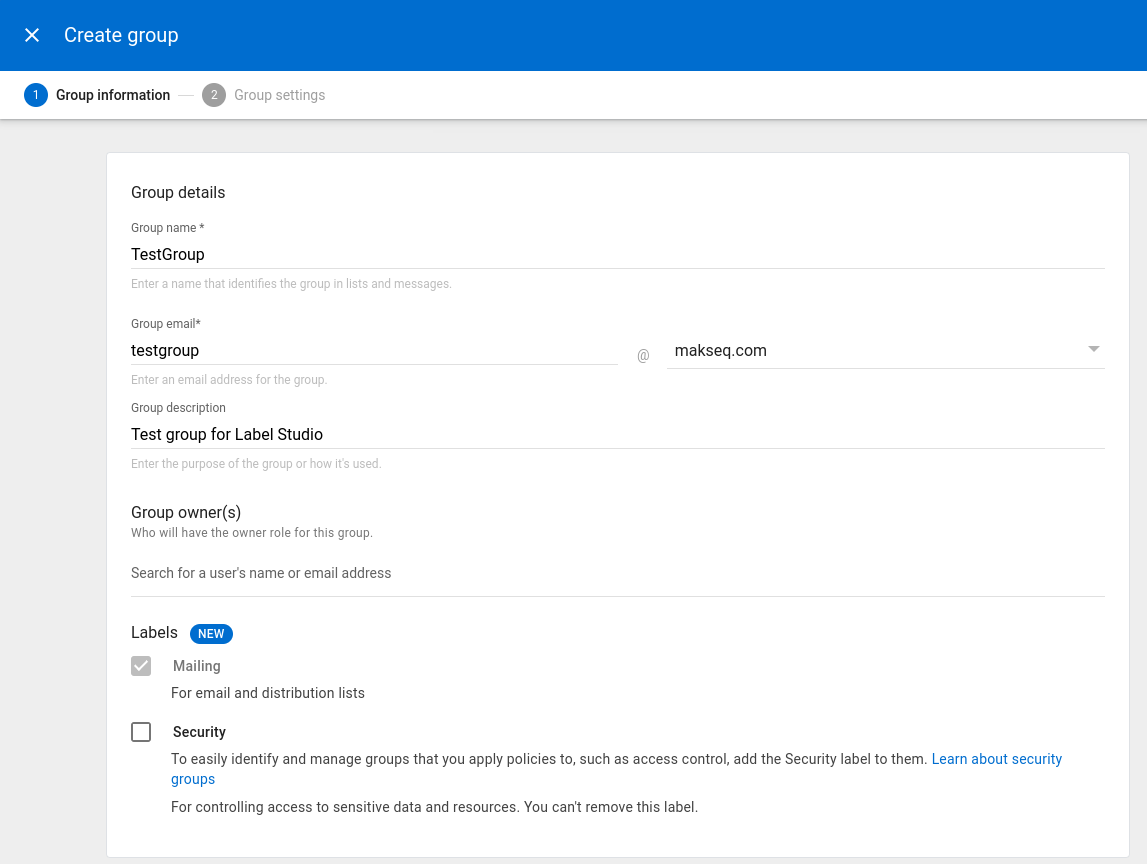
Add a new group:
- Click Create group and follow the steps to create and save a new group. In this example, the group is named “TestGroup.”
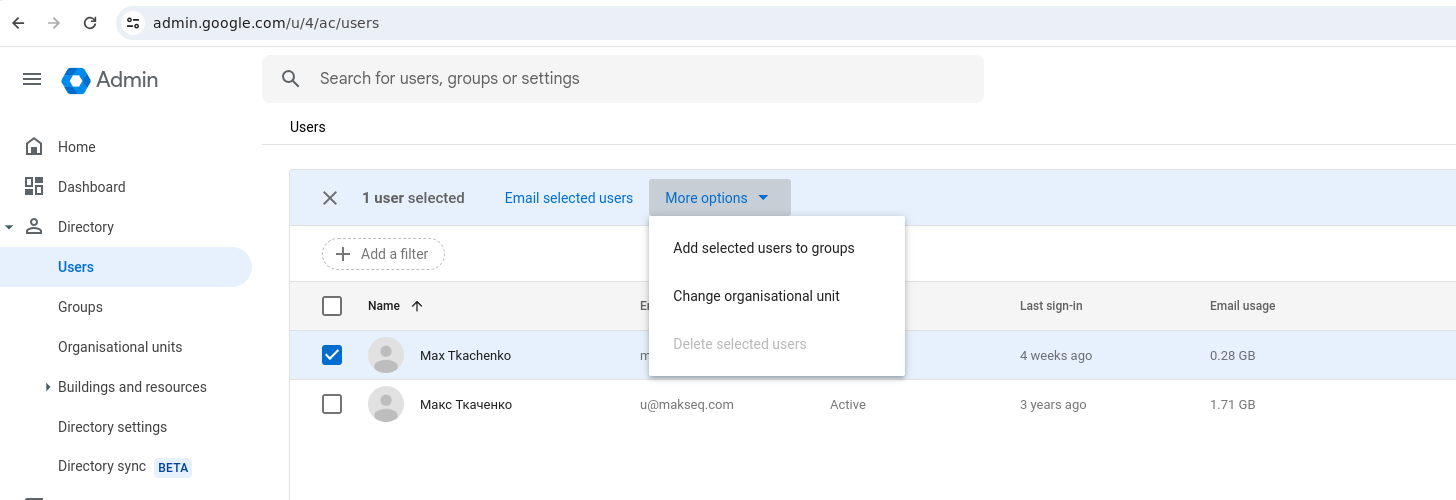
Assign users to the new group:
- Go to Directory > Users.
- Select the users you want to add to your new group.
- Select More options > Add selected users to groups.
Step 3: Configure Google as an Identity Provider (IdP)
Access Google Admin console:
- Log in to the Google Admin console.
- Go to Apps > Web and mobile apps.
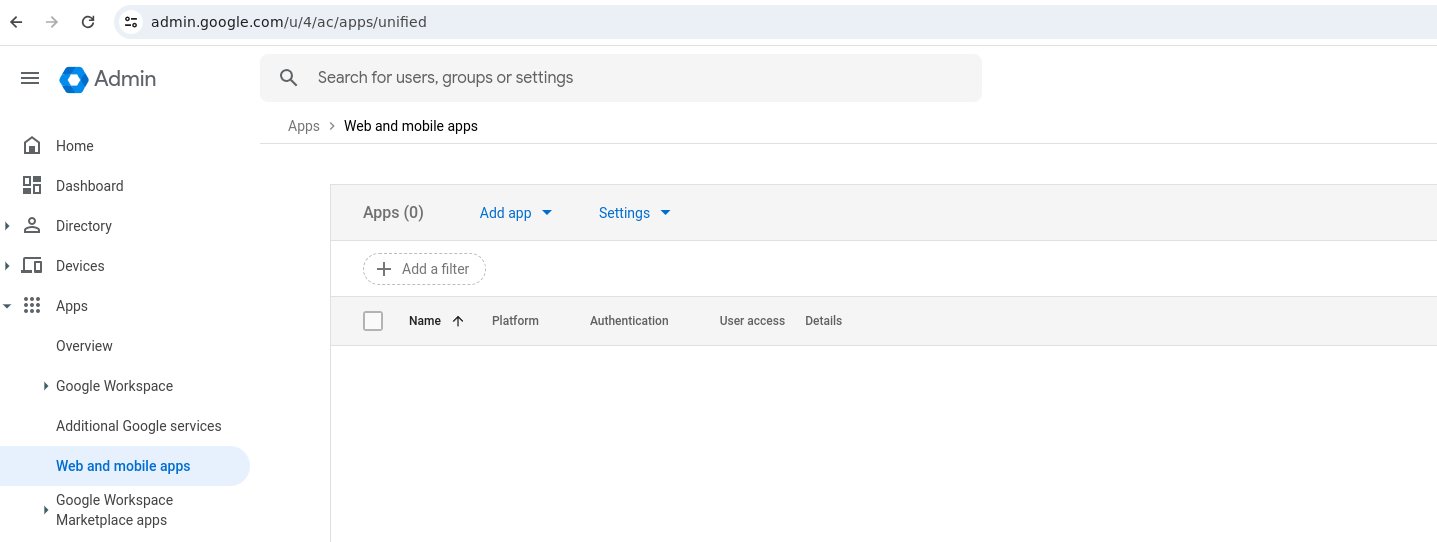
Add a new SAML app:
- Select Add App > Add custom SAML app.
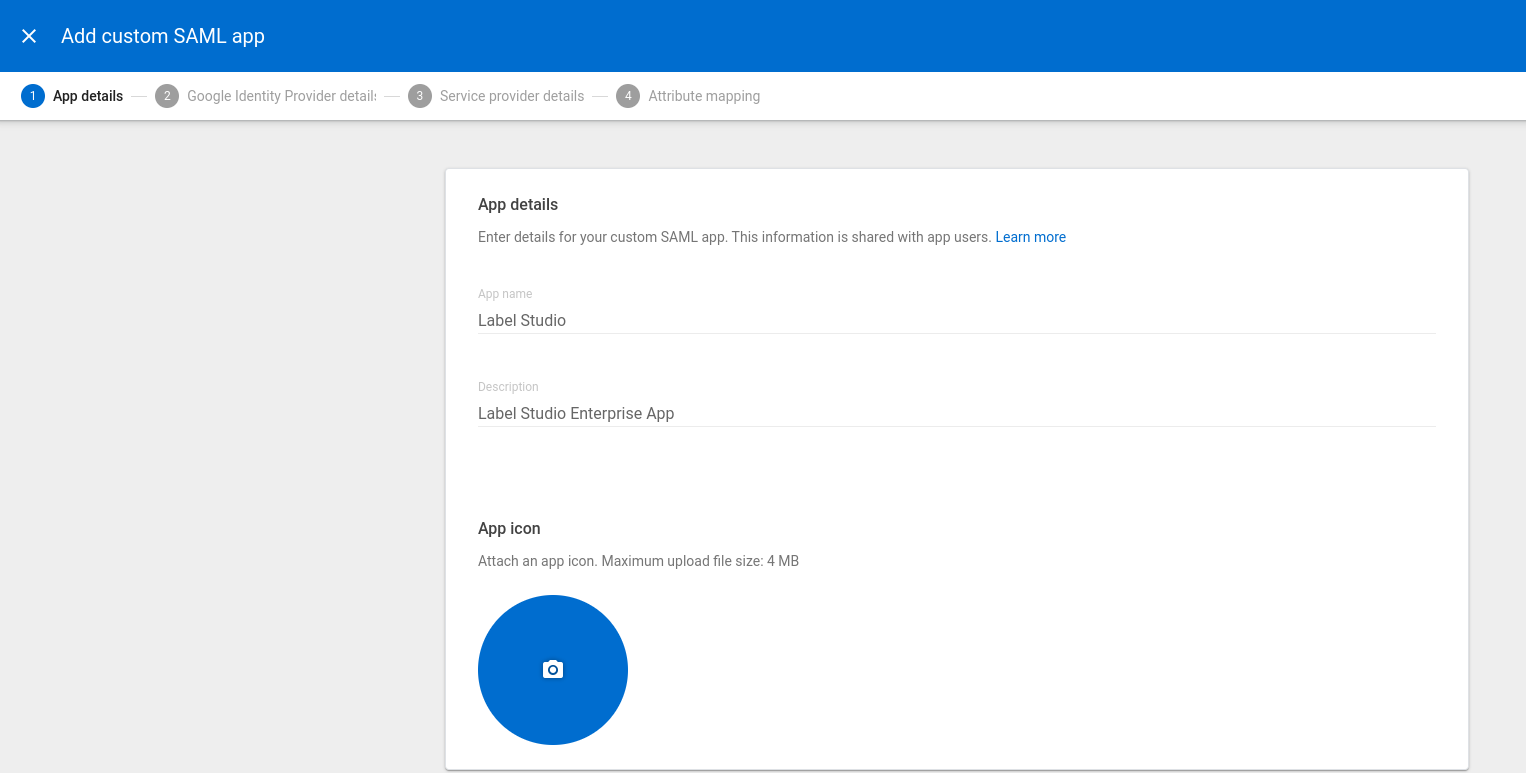
- Enter a name for the app (e.g. “Label Studio”) and click Continue.
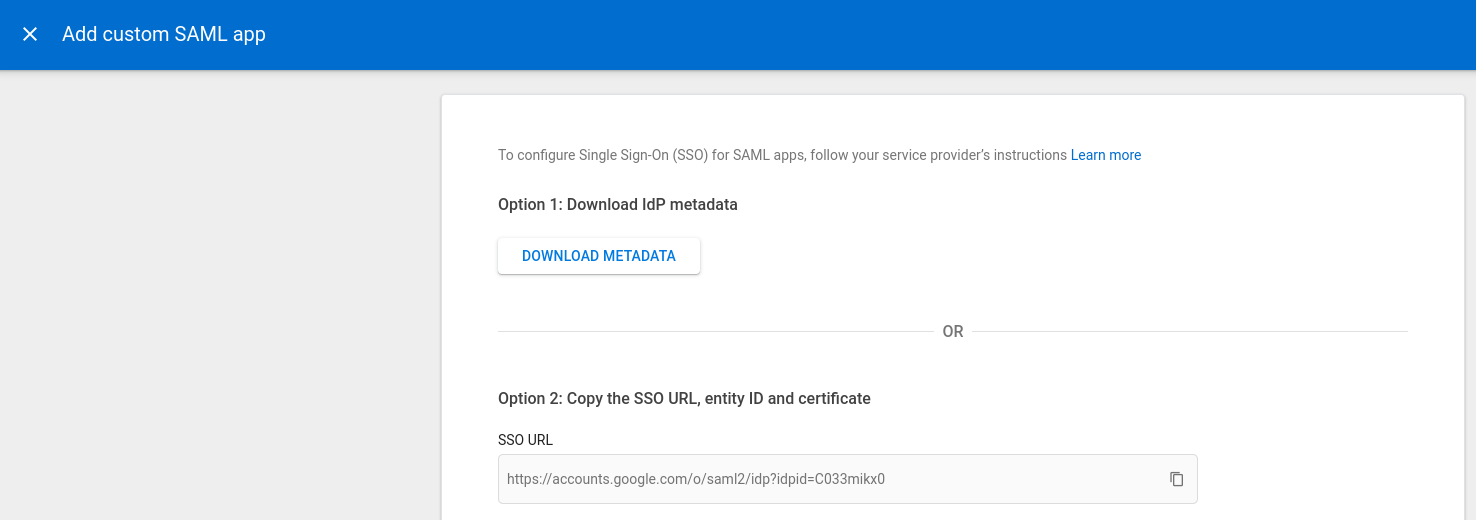
Download IdP metadata:
- When given the option, download the IdP metadata file for your new app. This file contains all the necessary information to configure Label Studio.
Configure SAML settings:
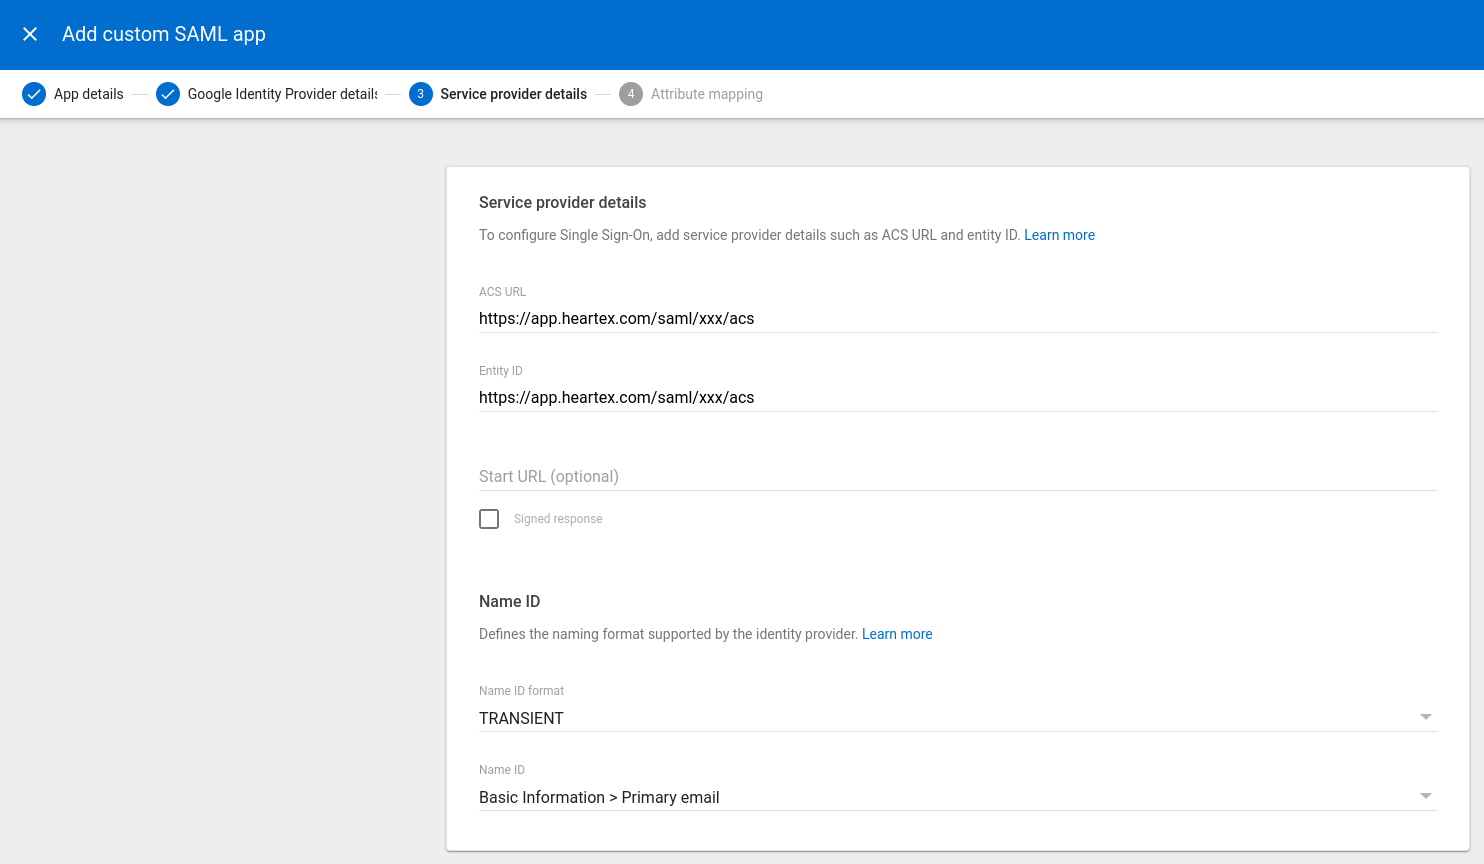
- In the Service Provider Details section, enter the following:
- ACS URL: Paste the ACS URL copied from Label Studio.
- Entity ID: Use the same URL as the ACS URL.
- Start URL: (Optional) You can leave this blank or use the Login URL from Label Studio.
- Signed Response: Leave this unchecked.
- Click Continue.
- In the Service Provider Details section, enter the following:
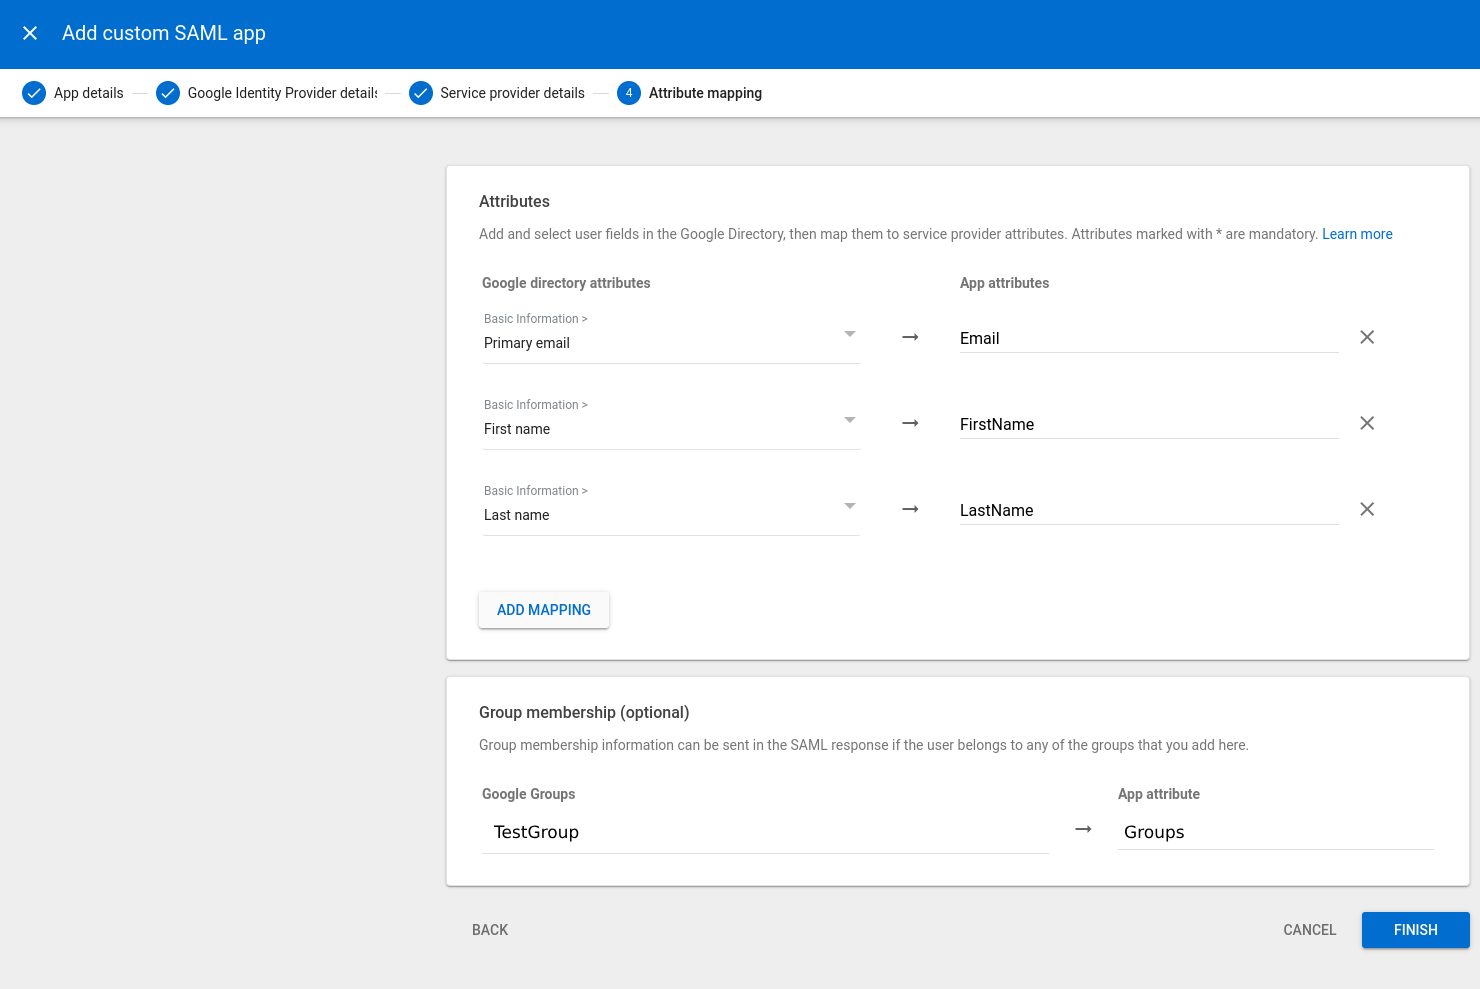
Map attributes:
- In the Attribute Mapping section, map the following attributes:
- Primary Email:
Email - First Name:
FirstName - Last Name:
LastName
- Primary Email:
- Click Finish.
- In the Attribute Mapping section, map the following attributes:
Step 4: Complete configuration in Label Studio
Upload IdP Metadata:
- Return to the Label Studio SSO & SAML settings page.
- Scroll to Add metadata from Identity Provider.
- Upload the IdP metadata file you downloaded from Google Admin console.
Map Groups and Roles:
- Set up group mappings to roles and workspaces as needed. Ensure the group names match those sent by Google in the SAML response.
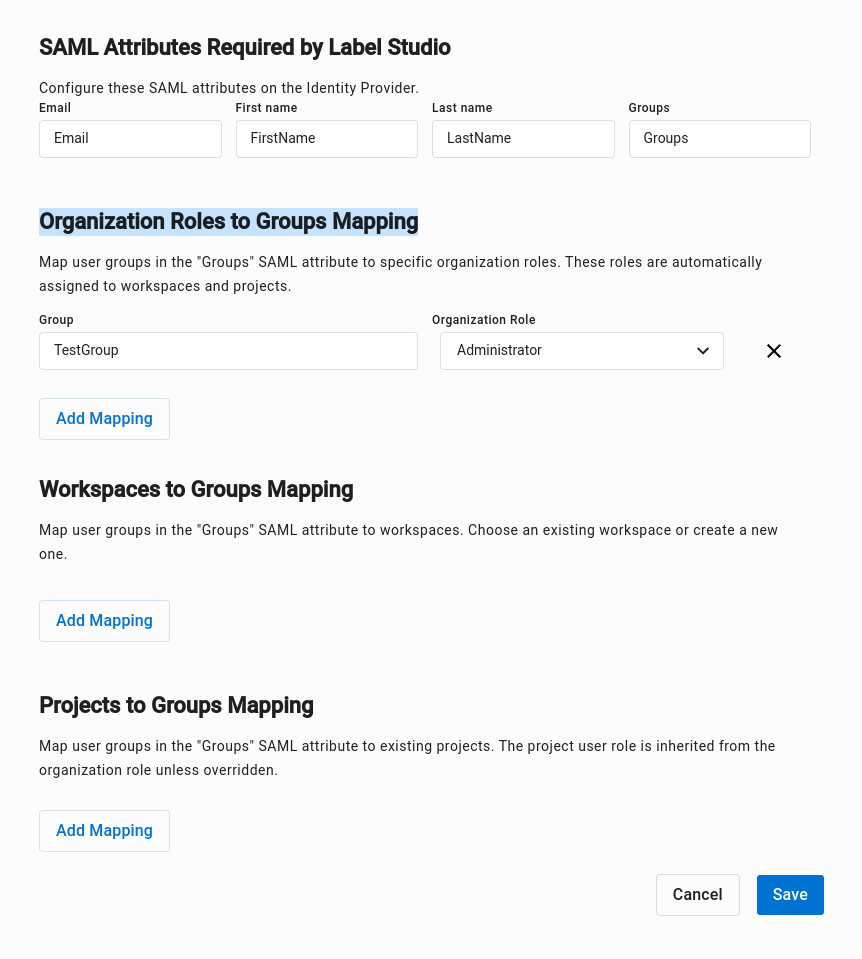
Save Configuration:
- Click Save to apply the SSO configuration.
Step 5: Complete configuration in the Google Admin console
Return to the Google Admin console:
- From the Google Admin console, go to Apps > Web and mobile apps.
- Select the Label Studio app.
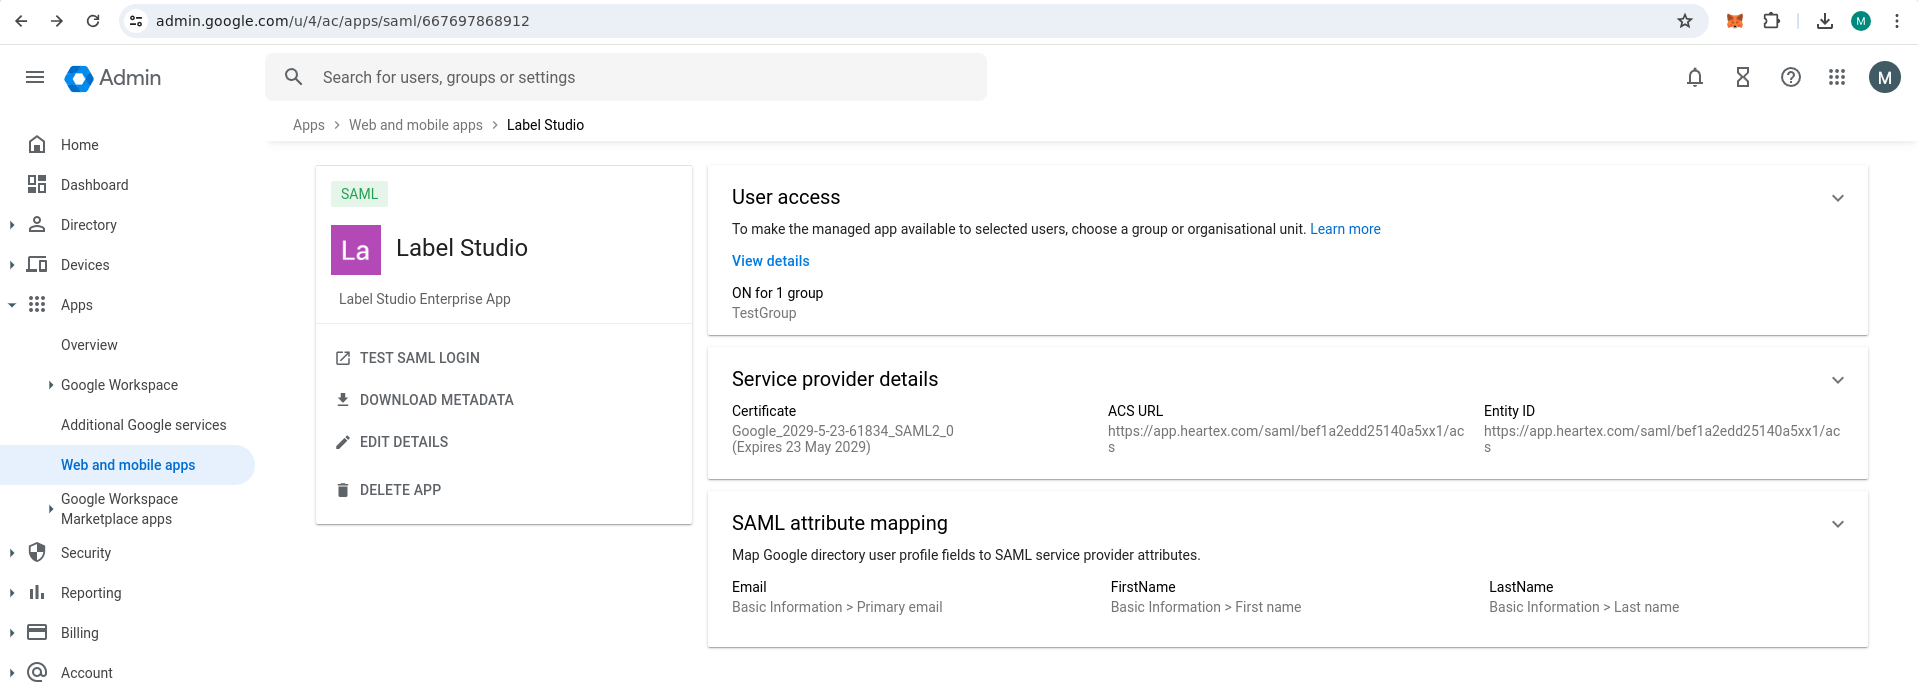
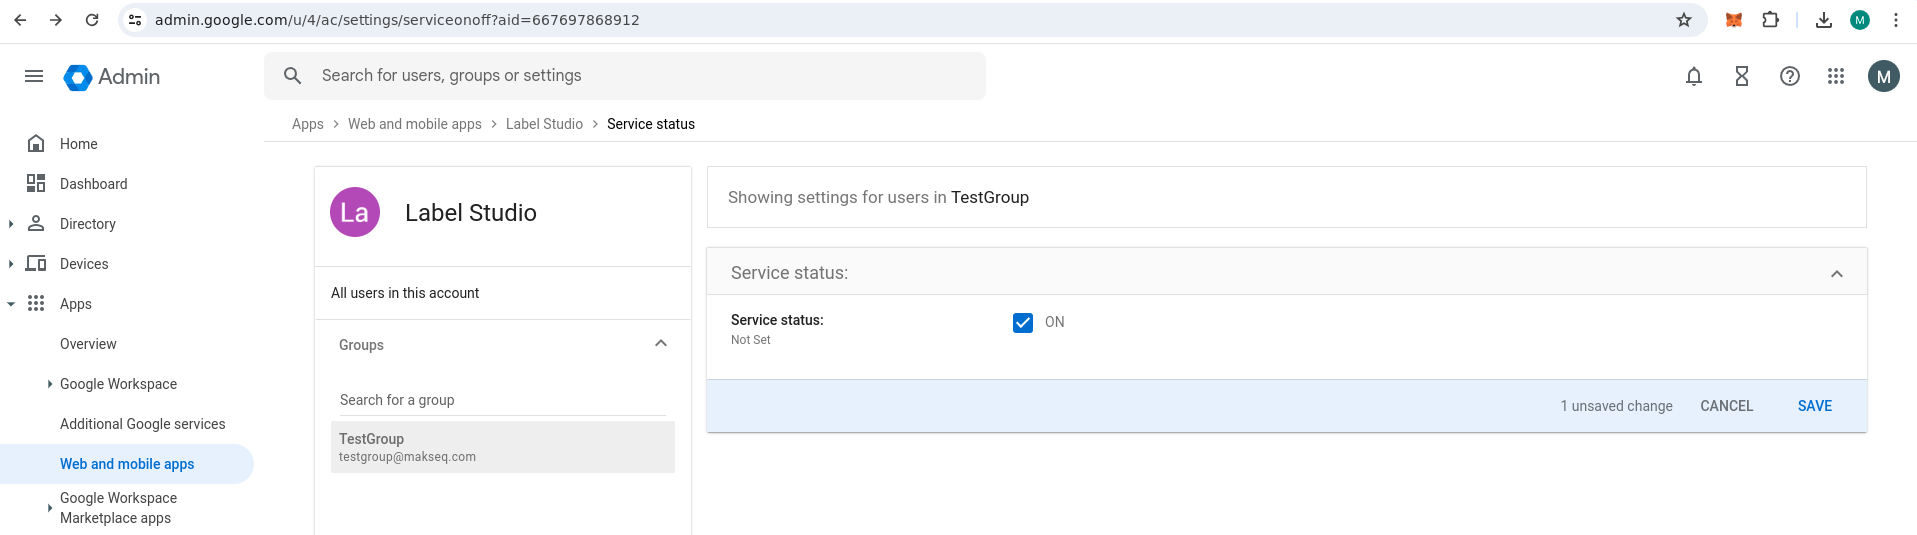
Assign the Label Studio application to the group:
- Click the User access card.
- Search for and then assign the group to the app.
- Enable the Service status toggle.
Step 6: Test the configuration
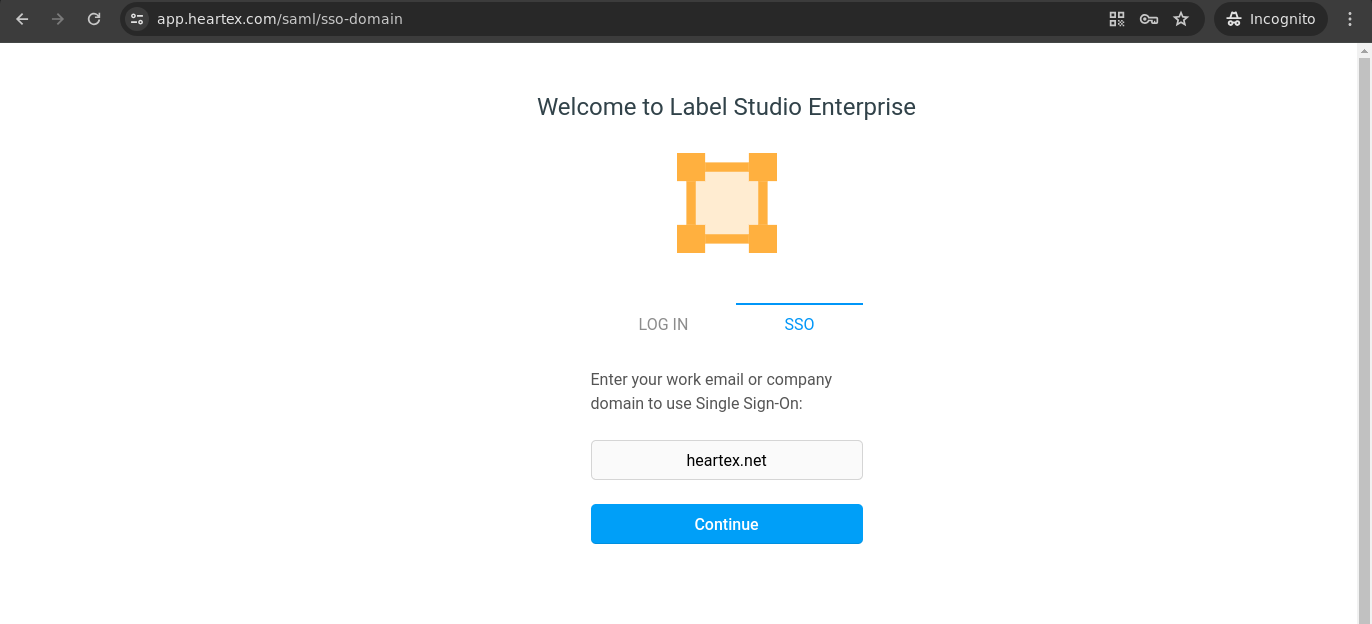
Log in using SSO:
- Navigate to the Label Studio login page.
- Click the SSO Login button and enter your company domain if prompted.
- You should be redirected to the Google SSO login page. After successful authentication, you will be redirected back to Label Studio.
Additional notes
- If you encounter any issues, verify that the SAML attributes and URLs are correctly configured in both Label Studio and Google Admin Console.
For more detailed information, you can refer to the