TextArea
The TextArea tag is used to display a text area for user input. Use for transcription, paraphrasing, or captioning tasks.
Use with the following data types: audio, image, HTML, paragraphs, text, time series, video.
Parameters
| Param | Type | Default | Description |
|---|---|---|---|
| name | string |
Name to identify the TextArea | |
| toName | string |
Name assigned to the object tag that the TextArea is labeling | |
| [value] | string |
A pre-filled default value that appears within the rendered TextArea field and can be submitted | |
| [placeholder] | string |
Placeholder text that appears inside the rendered TextArea field, but unlike value it cannot be submitted |
|
| [maxSubmissions] | string |
Maximum number of submissions | |
| [editable] | boolean |
false |
Whether to display an icon that allows the annotator to edit their text after adding it |
| [transcription] | boolean |
false |
When set to true and used with editable="true", the TextArea UI will remain an editable field even after you add your text |
| [skipDuplicates] | boolean |
false |
When set to true, a pop-up warning will appear and prevent duplicate values. See the example below |
| [displayMode] | tag | region-list |
tag |
Display mode for the TextArea; when set to region-list there will be an input field for every region in the Regions panel. See the example below |
| [rows] | number |
1 |
Number of rows in the TextArea input field. If 1, you can submit text by pressing Enter. If greater than 1, you can submit text by clicking Add or pressing Shift + Enter |
| [required] | boolean |
false |
Determine whether content in TextArea is required |
| [requiredMessage] | string |
Message to show if validation fails | |
| [showSubmitButton] | boolean |
Determine whether to show or hide the Add button. By default it’s hidden if rows="1", and it’s visible if there are more than 1 row |
|
| [perRegion] | boolean |
Use this tag to label regions instead of whole objects | |
| [perItem] | boolean |
Use this tag to label items inside objects instead of whole objects |
Example: Basic TextArea
You can open this example in the playground and experiment with different parameters.
<View>
  <TextArea name="text-area"></TextArea>
</View>
Example: Region list TextArea fields
This example combines the TextArea tag with other tags for OCR labeling.
Because displayMode="region-list", the text area fields are displayed under the Regions panel instead of in the labeling interface.
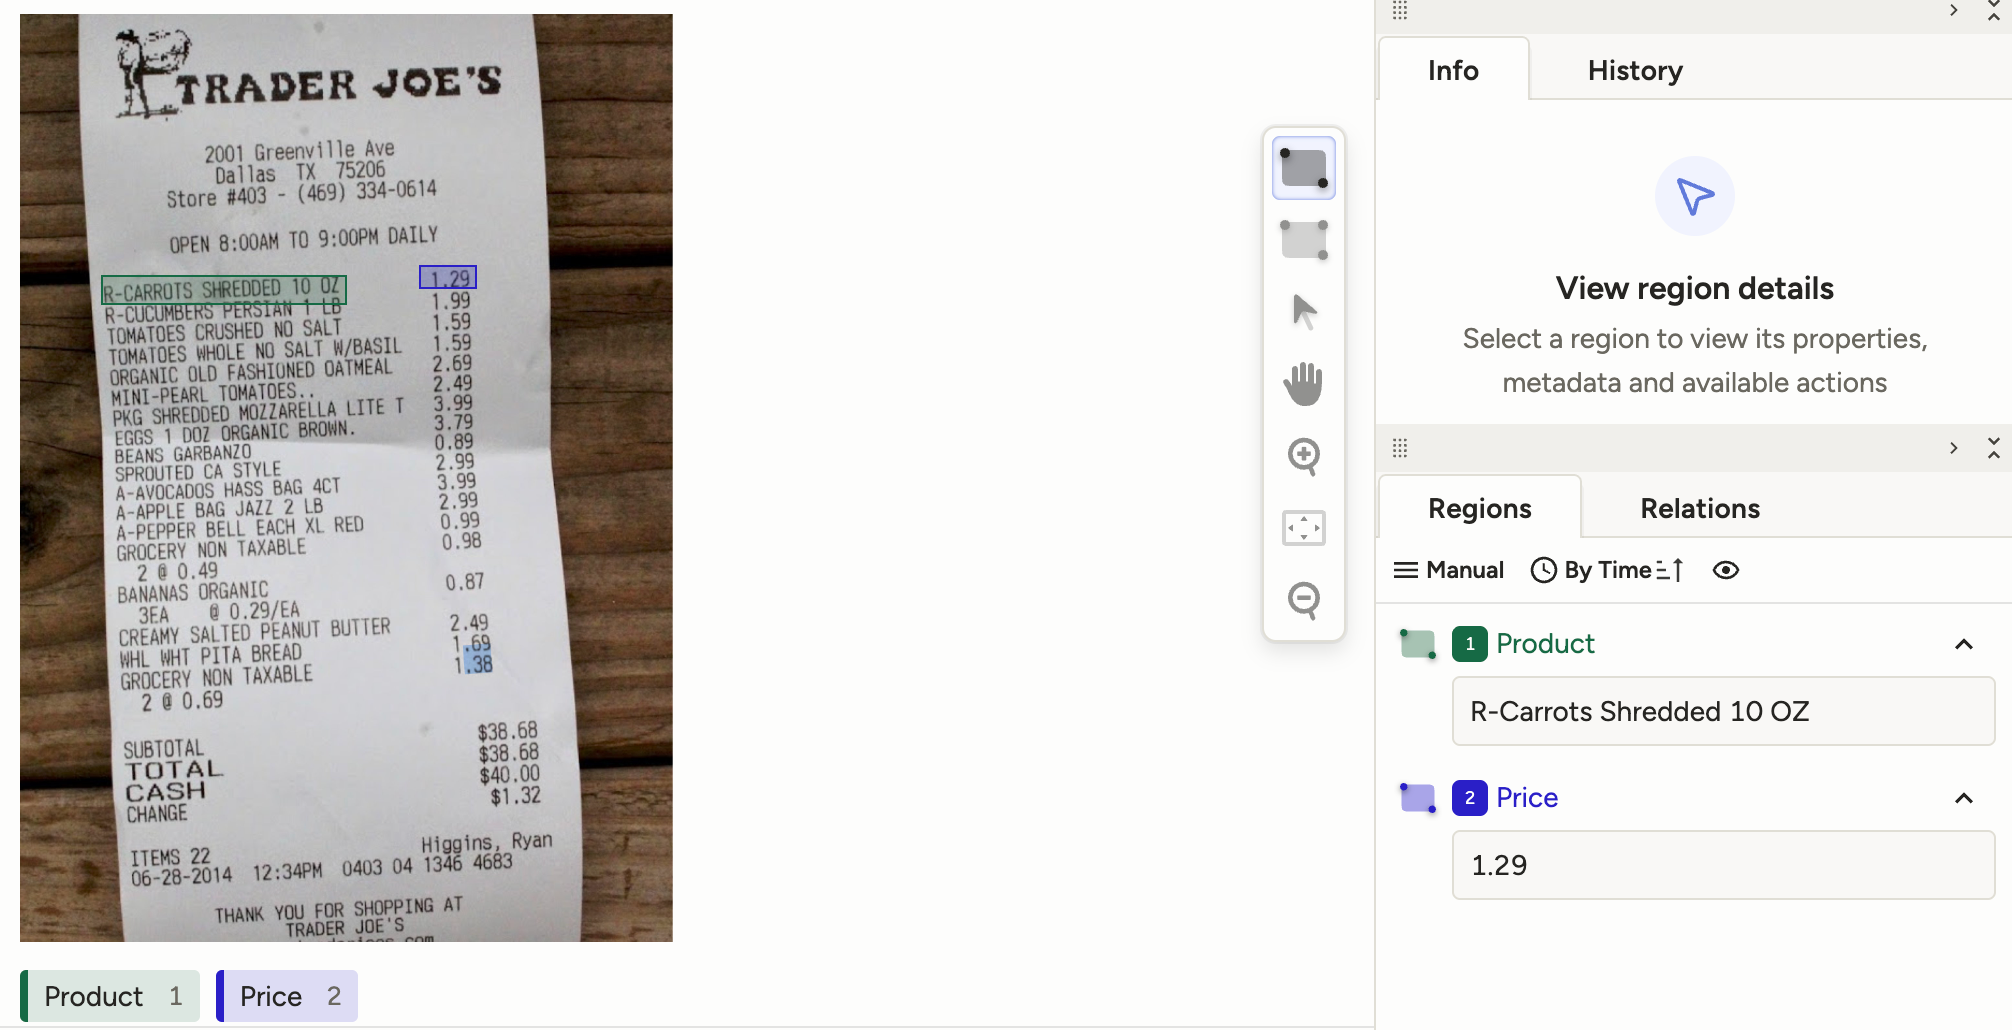
<View>
  <Image name="image" value="$ocr"/>
  <Labels name="label" toName="image">
    <Label value="Product" background="#166a45"/>
    <Label value="Price" background="#2a1fc7"/>
  </Labels>
  <Rectangle name="bbox" toName="image" strokeWidth="3"/>
  <TextArea name="transcription" toName="image" editable="true" perRegion="true" required="true" maxSubmissions="1" rows="5" placeholder="Recognized Text" displayMode="region-list"/>
</View>
Example: Enforce unique values
To keep submissions unique, you can set skipDuplicates="true". The user will receive a pop-up message if they attempt to enter the same value twice.
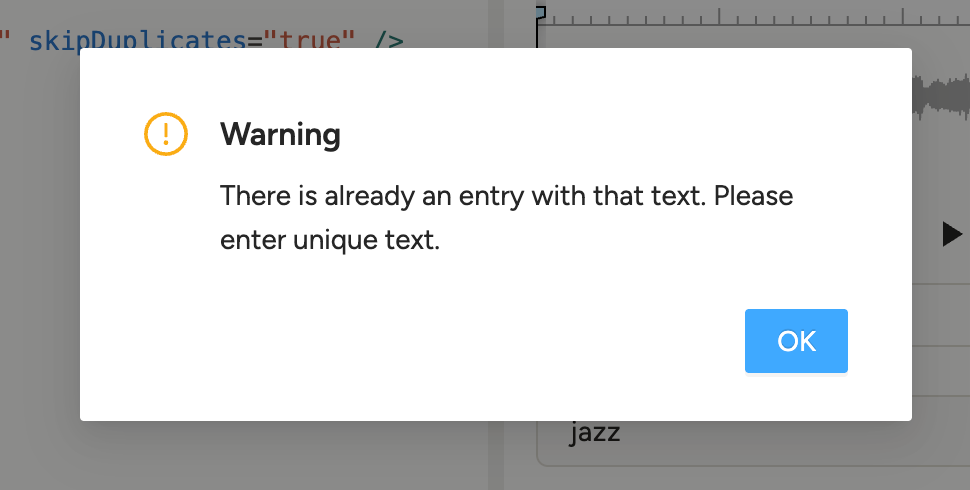
<View>
  <Audio name="audio" value="$audio"/>
  <TextArea name="genre" toName="audio" skipDuplicates="true" />
</View>
Example: Ensure users can submit by pressing Enter
If you are trying to optimize your annotation process by speed, you may want to use keyboard shortcuts or want to avoid additional clicks.
For that you should note the following:
If
rows="1"you can press Enter to submit your text.If rows > 1, the Add button appears. You can click this or press Shift + Enter.
You do not have to add the text (meaning click Add or pressing Enter/Shift + Enter) to save your text when you press Submit.
It is enough to simply enter your text into the input field. You only need to add your text if you want to include multiple submissions from the same TextArea. See the video below.
Tip
You can click Control + Enter (Windows) or Command + Enter (Mac) to submit the annotation.
You can also configure your own custom hotkeys
<View>
  <Header value="Press Enter to submit"/>
  <Text name="text1" value="Example text 1" />
  <TextArea name="text-area-1" toName="text1" rows="1" />

  <Header value="Press Shift + Enter to submit"/>
  <Text name="text2" value="Example text 2" />
  <TextArea name="text-area-2" toName="text2" rows="3" />
</View>