Side-by-Side LLM Output Comparison
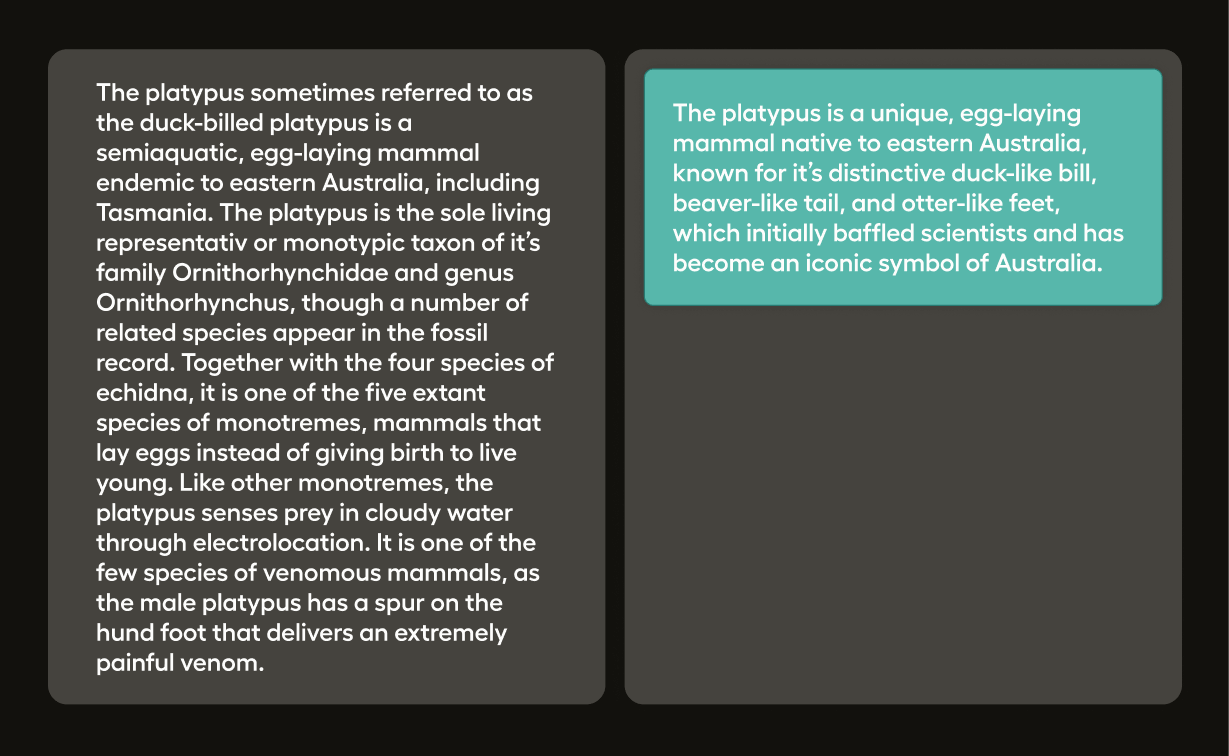
Sometimes you need to compare two different model responses or compare the model response with a ground truth. In this template, two options are presented side by side, and then you click to select the one that matches your criteria.
For a tutorial on how to use this template with the Label Studio SDK, see Evaluate LLM Responses.
Configure the labeling interface
Create a project with the following labeling configuration:
<View className="root">
  <Style>
    .root {
      box-sizing: border-box;
      margin: 0;
      padding: 0;
      font-family: 'Roboto',
        sans-serif;
      line-height: 1.6;
      background-color: #f0f0f0;
    }

    .container {
      margin: 0 auto;
      padding: 20px;
      background-color: #ffffff;
      border-radius: 5px;
      box-shadow: 0 4px 8px 0 rgba(0, 0, 0, 0.1), 0 6px 20px 0 rgba(0, 0, 0, 0.1);
    }

    .prompt {
      padding: 20px;
      background-color: #0084ff;
      color: #ffffff;
      border-radius: 5px;
      margin-bottom: 20px;
      box-shadow: 0 2px 4px 0 rgba(0, 0, 0, 0.1), 0 3px 10px 0 rgba(0, 0, 0, 0.1);
    }

    .answers {
      display: flex;
      justify-content: space-between;
      flex-wrap: wrap;
      gap: 20px;
    }

    .answer-box {
      flex-basis: 49%;
      padding: 20px;
      background-color: rgba(44, 62, 80, 0.9);
      color: #ffffff;
      border-radius: 5px;
      box-shadow: 0 2px 4px 0 rgba(0, 0, 0, 0.1), 0 3px 10px 0 rgba(0, 0, 0, 0.1);
    }

    .answer-box p {
      word-wrap: break-word;
    }

    .answer-box:hover {
      background-color: rgba(52, 73, 94, 0.9);
      cursor: pointer;
      transition: all 0.3s ease;
    }

    .lsf-richtext__line:hover {
      background: unset;
    }

    .answer-box .lsf-object {
      padding: 20px
    }
  </Style>
  <View className="container">
    <View className="prompt">
      <Text name="prompt" value="$prompt" />
    </View>
    <View className="answers">
      <Pairwise name="comparison" toName="answer1,answer2"
                selectionStyle="background-color: #27ae60; box-shadow: 0 4px 8px 0 rgba(0, 0, 0, 0.2), 0 6px 20px 0 rgba(0, 0, 0, 0.2); border: 2px solid #2ecc71; cursor: pointer; transition: all 0.3s ease;" />
      <View className="answer-box">
        <Text name="answer1" value="$answer1" />
      </View>
      <View className="answer-box">
        <Text name="answer2" value="$answer2" />
      </View>
    </View>
  </View>
</View>
This configuration includes the following elements:
<View>- All labeling configurations must include a baseViewtag. In this configuration, theViewtag is used to configure the display of blocks, similar to the div tag in HTML. It helps in organizing the layout of the labeling interface.<Style>- TheStyletag is used to define CSS styles that apply to the elements within theView. In this configuration, it sets styles for various classes various sections of the labeling interface layout.<Text>- TheTexttag is used to display text provided by the input data. Given the example input data below, the text blocks are either displaying information from thepromptor one of the responses (answer1oranswer2). You will likely want to adjust the values to match your own JSON structure.<Pairwise>- ThePairwisetag is used to display the selection element. It presents the options for the user to click and select. Read more about Label Studio template for pairwise comparison.
Input data
In this example, you are including the prompt and then two responses from different LLMs.
[
  {
    "data": {
      "prompt": "What is the capital of France?",
      "answer1": "Paris",
      "answer2": "London"
    }
  }
]