Evaluate RAG with Ragas
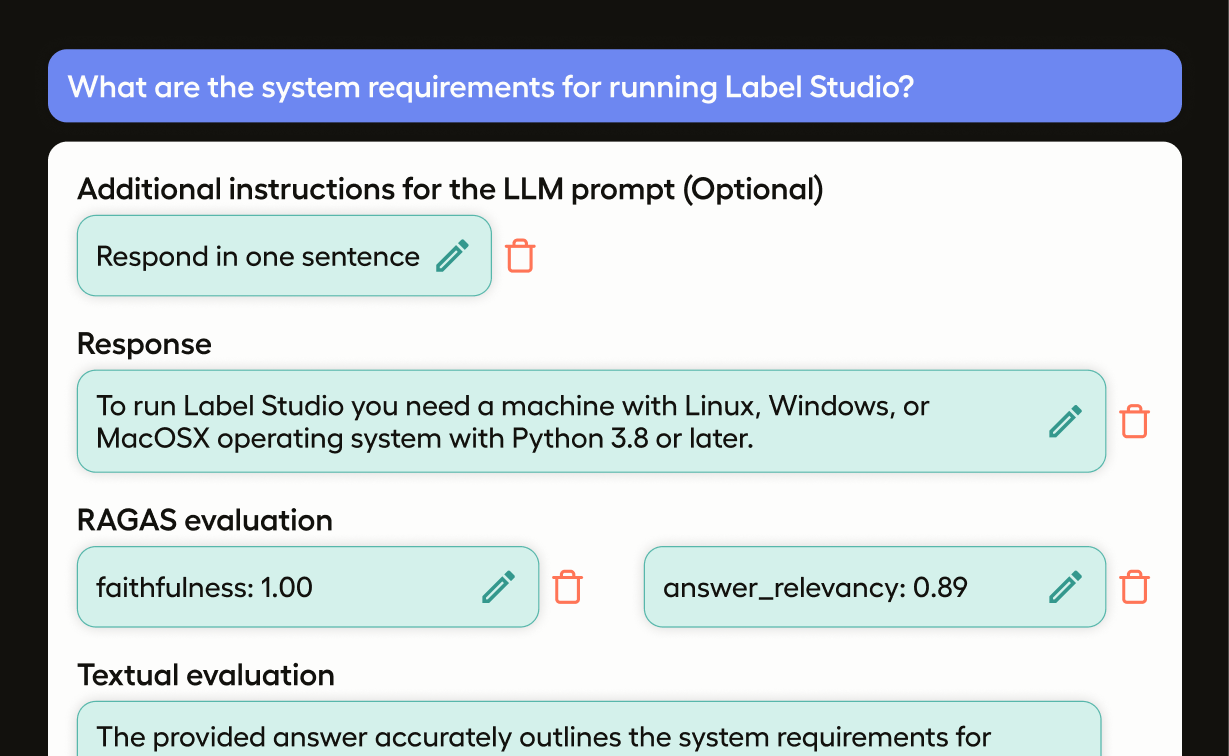
This template uses the Ragas framework to evaluate your RAG pipeline. When given a prompt, it will use Ragas and OpenAI to return the following:
- An LLM-generated response to the prompt (the ML backend example uses OpenAI).
- Ragas scores for faithfulness and answer relevancy.
- An LLM-generated evaluation of the response.
- A comprehensive overview of precisely which documents were used for context.
Prerequisites
This template requires an ML backend to work. Follow the instructions outlined in RAG Quickstart Labeling to connect the ML backend to your project.
You will need an OpenAI API key and a directory with documentation files to use as context.
Tip
If you are just looking to experiment with this template and the ML backend, you can clone the Label Studio repository and use the label-studio\docs directory as your context.
Configure the labeling interface
Use the following labeling configuration for your project:
<View>
    <Style>
        .lsf-main-content.lsf-requesting .prompt::before { content: ' loading...'; color: #808080; }
        .text-container {
        background-color: white;
        border-radius: 10px;
        box-shadow: 0px 4px 6px rgba(0, 0, 0, 0.1);
        padding: 20px;
        font-family: 'Courier New', monospace;
        line-height: 1.6;
        font-size: 16px;
        }
        .ragas input {
            background: none;
            border: none;
            padding: 0;
            margin-top: -8px;
            font-size: 20px;
            font-weight: 600;
        }
        .ragas input::-webkit-inner-spin-button {
          -webkit-appearance: none;
          margin: 0;
        }
    </Style>
    <Header value="Question:"/>
    <View className="text-container">
        <Text name="context" value="$text"/>
    </View>
    <Header value="Additional instructions for the LLM prompt (optional):"/>
    <View className="prompt">
        <TextArea name="prompt"
                  toName="context"
                  rows="4"
                  editable="true"
                  showSubmitButton="false"
                  placeholder="Provide additional instructions here then Shift+Enter - to provide none, simply enter a space then shift+enter."
        />
    </View>
    <Header value="Response:"/>
    <TextArea name="response"
              toName="context"
              rows="4"
              editable="true"
              maxSubmissions="1"
              showSubmitButton="false"
              smart="false"
              placeholder="Generated response will appear here..."
    />
    <View className="ragas" >
    <View style="display: flex;">
      <Header style="padding-right: 1em;" value="Ragas evaluation (averaged, 0 to 100):"/><Number name="float_eval" toName="context" defaultValue="0" />
    </View>
    <TextArea name="ragas"
              toName="context"
              rows="2"
              maxSubmissions="1"
              showSubmitButton="false"
              smart="false"
              placeholder="Ragas evaluation will appear here..."
    />
    </View>
    <View className="evaluation" >
    <View style="display: flex;">
      <Header style="padding-right: 1em;" value="Textual evaluation:"/>
    </View>
    <TextArea name="evaluation"
              toName="context"
              rows="2"
              maxSubmissions="1"
              showSubmitButton="false"
              smart="false"
              placeholder="Textual evaluation will appear here..."
    />
    </View>
    <Header value="Documentation:"/>
    <View className="documentation">
    <TextArea name="documentation"
              toName="context"
              rows="2"
              maxSubmissions="1"
              showSubmitButton="false"
              smart="false"
              placeholder="Retrieved documentation will appear here..."
    />
    </View>
</View>
This configuration includes the following elements:
<View>- All labeling configurations must include a baseViewtag. In this configuration, theViewtag is used to configure the display of blocks, similar to the div tag in HTML. It helps in organizing the layout of the labeling interface.<Style>- TheStyletag is used to define CSS styles that apply to the elements within theView. In this configuration, it sets styles for various classes various sections of the labeling interface layout.<Header>- TheHeadertag is used to display a header or title within the labeling interface. The text of the header is defined in thevalueparameter.<TextArea>- TheTextAreatag provides a field where you can enter text. In this case, most of the text fields will be auto-completed by the ML backend. There is one field where you can provide additional instructions to the LLM (for example, by asking it to format the answer as a list). Press Shift + Enter to submit your instructions.
Input data
Using the configuration above, you would want to structure your input data to have a text element. This is the LLM prompt. For example:
[
  {
    "id": 1,
    "data": {
      "text": "What are the system requirements for Label Studio?"
    }
  },
  {
    "id": 2,
    "data": {
      "text": "How do I update Label Studio?"
    }
  }
]