How to Annotate in Label Studio
Welcome to the Label Studio platform!
In this document, we will jump-start your understanding of data annotation. Every project is used to train models based on its particular use case.
There are a variety of use cases that can be implemented via Label Studio, including, but not limited to, pre-training, post-training, benchmarking, etc.
In essence, every task you annotate is a way to better your team’s model. Whether you’re a doctorate-holding specialist or a research-savvy generalist, your knowledge and capabilities are needed to train models.
Usually, after you submit your task, Label Studio Enterprise sends off all submitted annotated tasks to reviewers, who verify if there are any errors. Exact steps vary by team, but most workflows follow a pattern like: annotation → review and quality assurance → production.
During the quality assurance step, tasks are evaluated and graded. Tasks are graded based on how closely they align with the project’s protocols.
What You Need
Computer
While some teams may be flexible in the types of device that can be used, it is highly recommended that you use a laptop or desktop, as mobile devices often do not have enough processing power when a project involves larger files, nor ideal visibility of a lengthier task.Confirm with your team lead whether there are any restrictions on which device you can use. In some cases, your current company hardware may not be approved or preferred for labeling.
Project Protocols
During your onboarding, your team lead should provide you with documentation regarding project workflows and steps. Depending on the length and scope of your first days, a lead would often walk you through one or two tasks so that you would have some guidance. Alternatively, you may be presented with video recordings for you to go through the protocols yourself.Proper Account Permissions
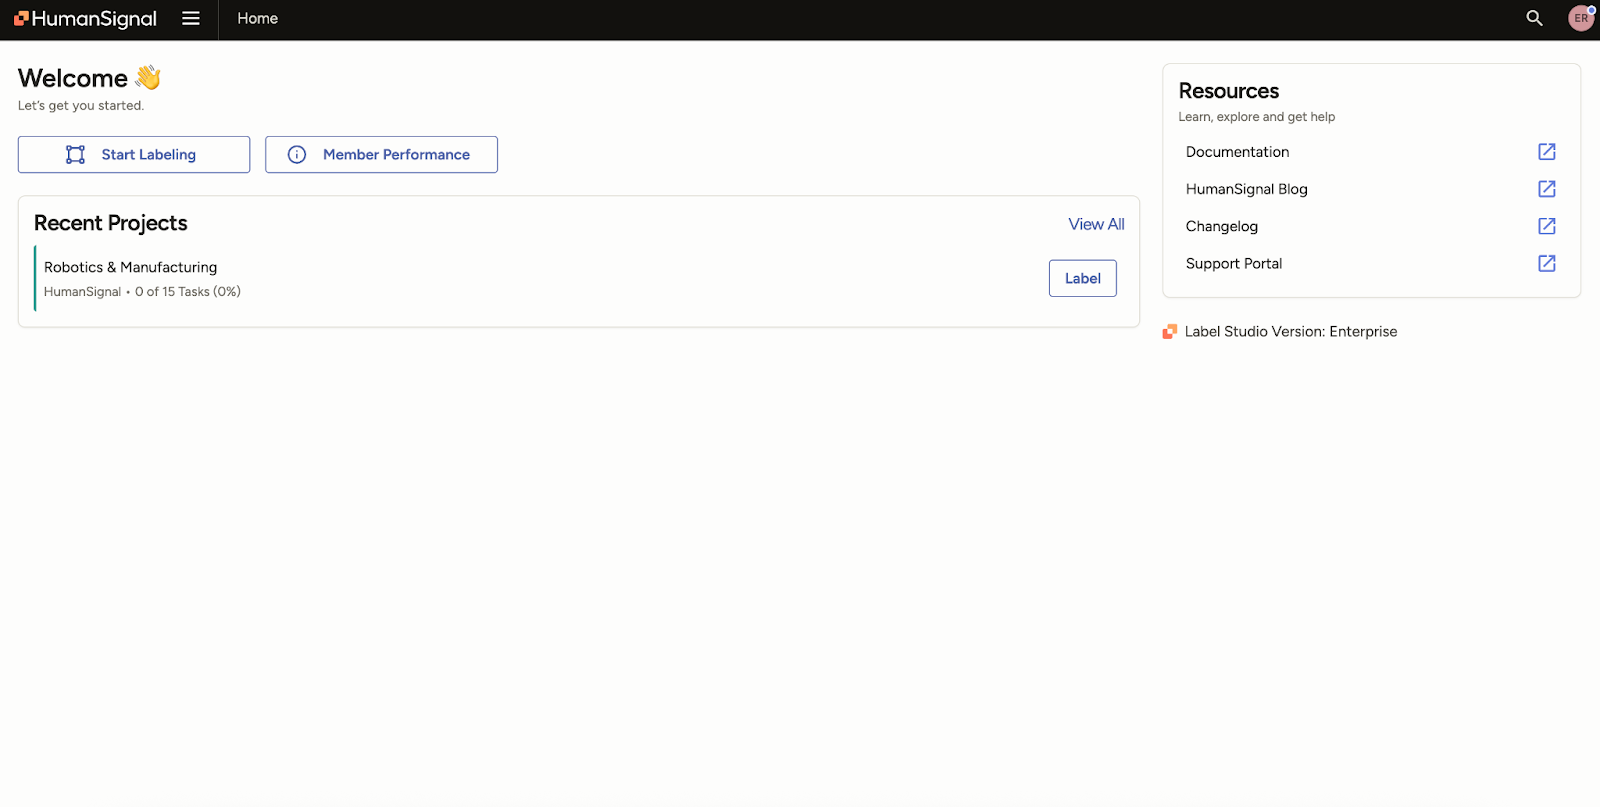
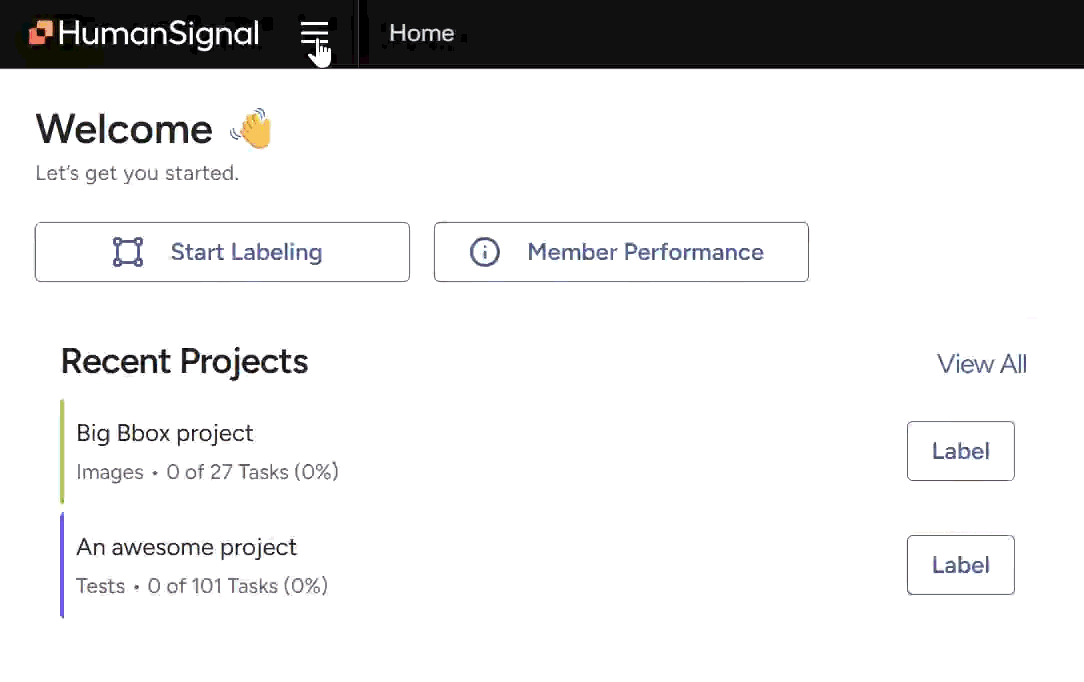
When your Label Studio account is created, your team lead needs to add you to the appropriate projects for you to work on. Sometimes, you may be added onto more than one, so it is important that you ensure you have access to and are working on your highest priority project.The following view is how your home dashboard should look if you have a project assigned to you. This means your permissions are set and you’re ready to get to work!
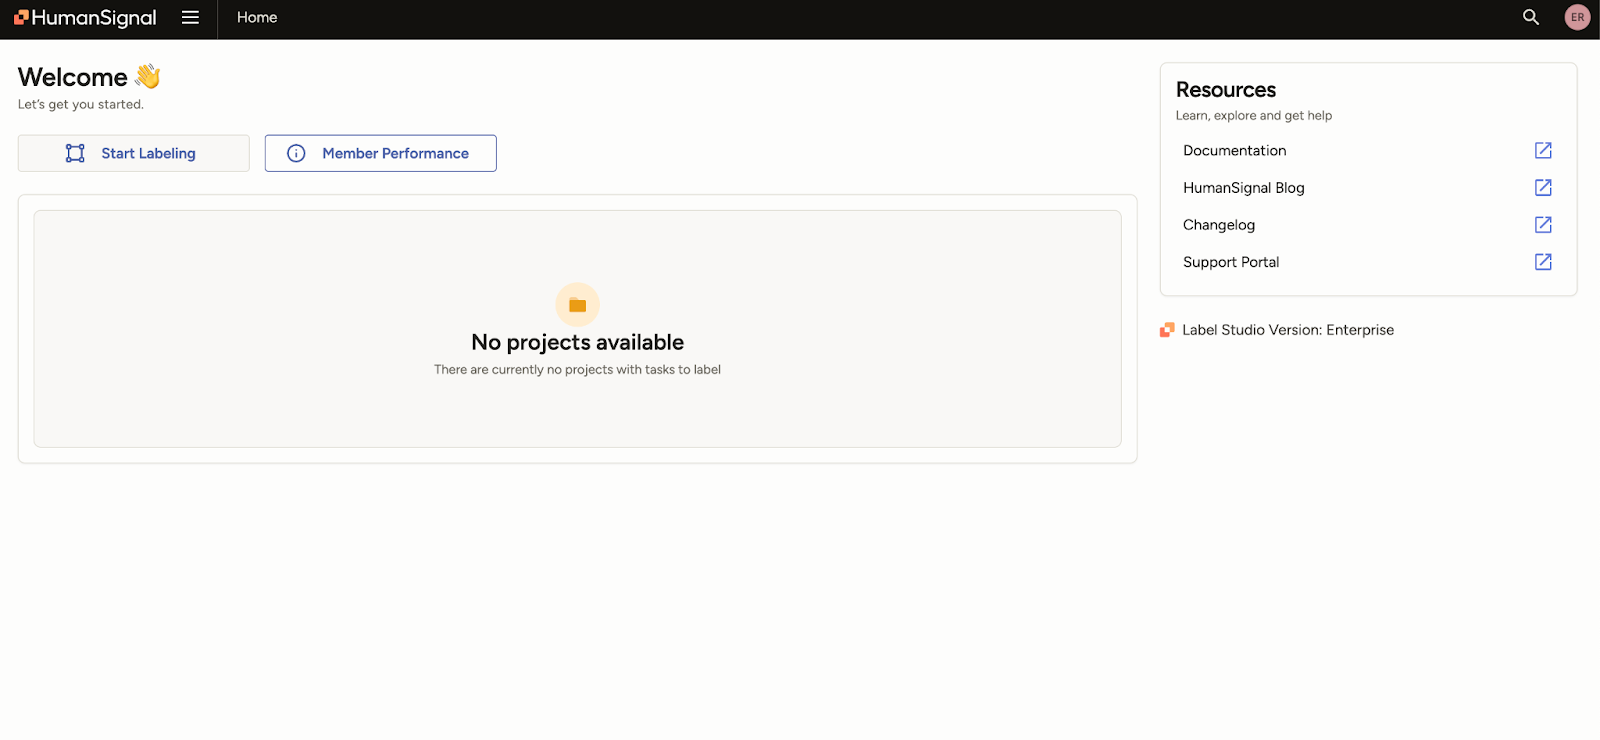
The following view would occur if you are missing the properly activated projects. If you have this view, please contact your lead.
Walkthrough:
How do I access Label Studio?
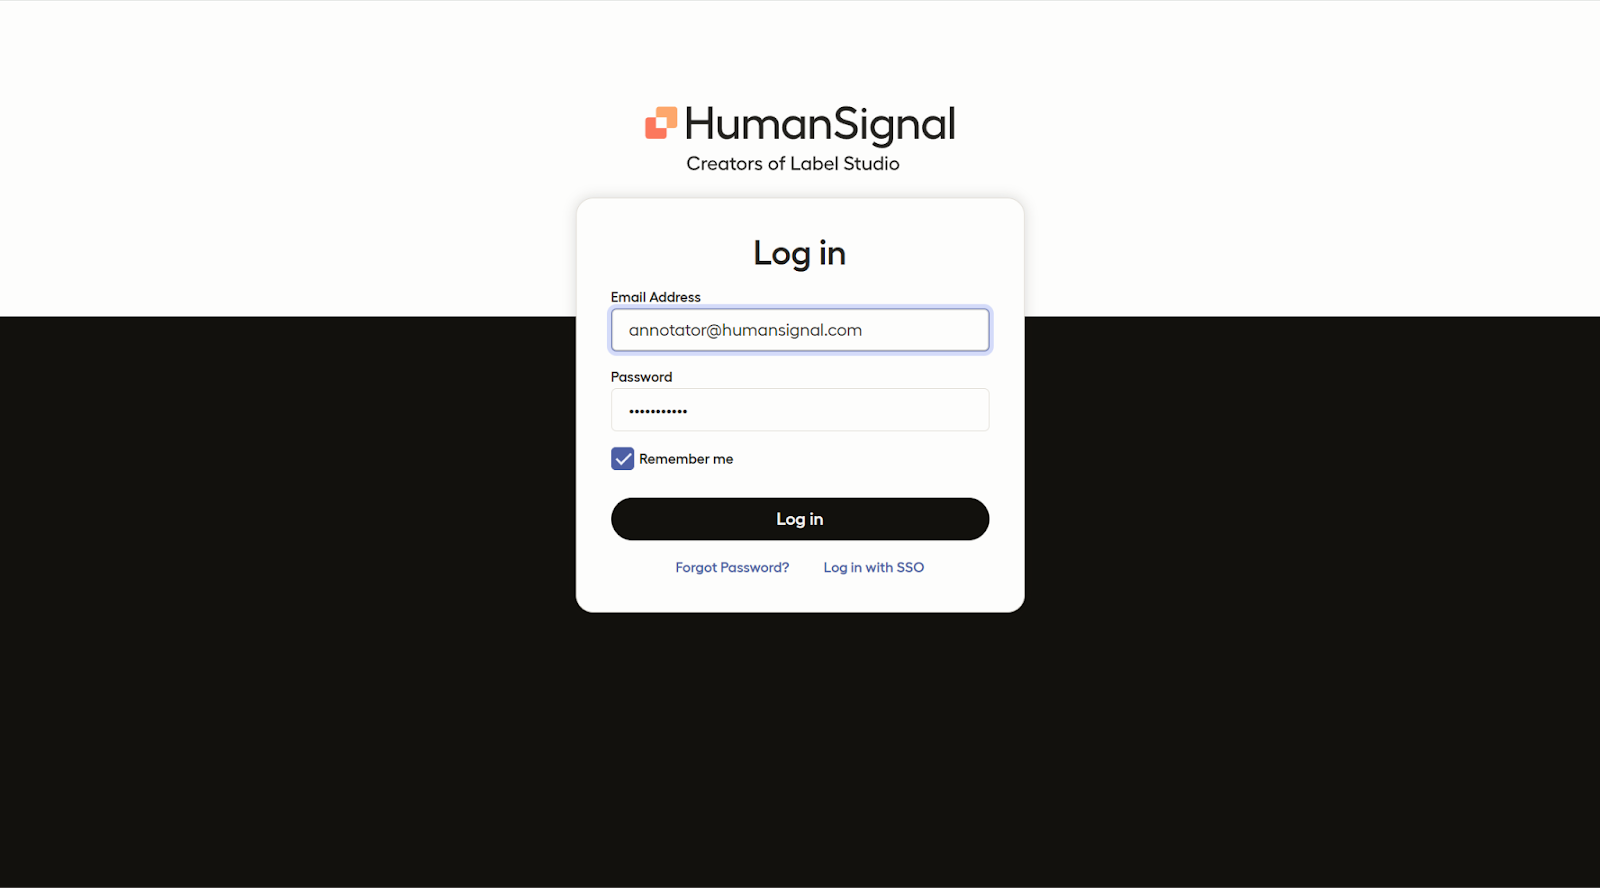
When you initially receive access to Label Studio, you will receive an email and a link to sign up.
To access your company’s projects, use the information you provided at sign up to log in. (Location link may vary depending on whether your team works directly on Label Studio or in your company’s own integrated workspace.)
How Do I Find My Projects?
Your recent projects will be on your home page when you sign in. You can choose to pin your priority projects onto this section.
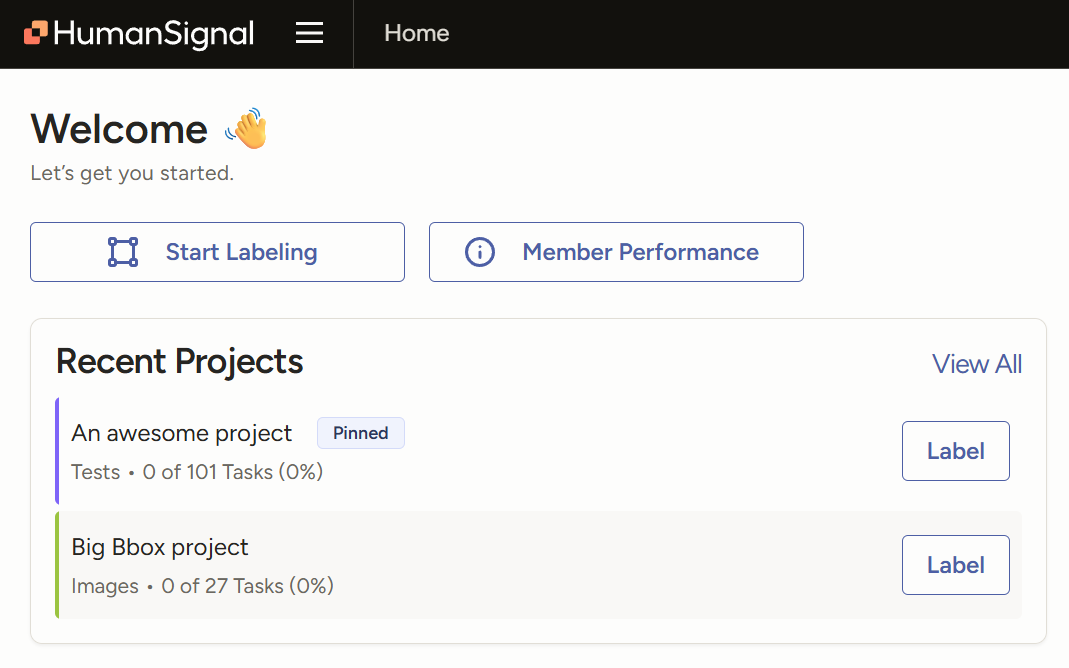
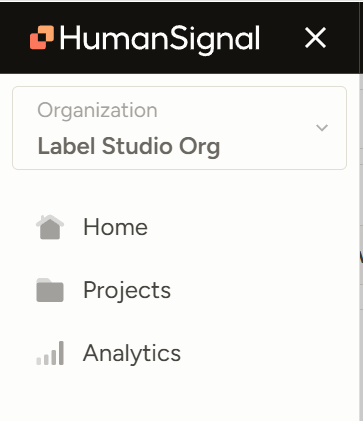
Alternatively, click the hamburger menu at the top of your dashboard to open the side menu and view your Projects folder. If you click the folder and don’t see the correct project listed, your permissions may not be updated yet. Contact your team lead to resolve this.
Are There Set Expectations for my Project?
Exact standards would be discussed during onboarding. During that time, your lead normally conveys:
- Desired task output over a given time
- Target scoring averages
- Projected amount of time each task would take
- Etc.
How Do You Annotate?
Select the project you want to work on.

When you click “label,” you are brought to your first task.
Annotate the task. If, for whatever reason, you are unable to complete the task (e.g. not a subject matter expert, etc.,), click the “Skip” button. If there is no “Skip” available for you, please consult your team lead on what would be best practices here.
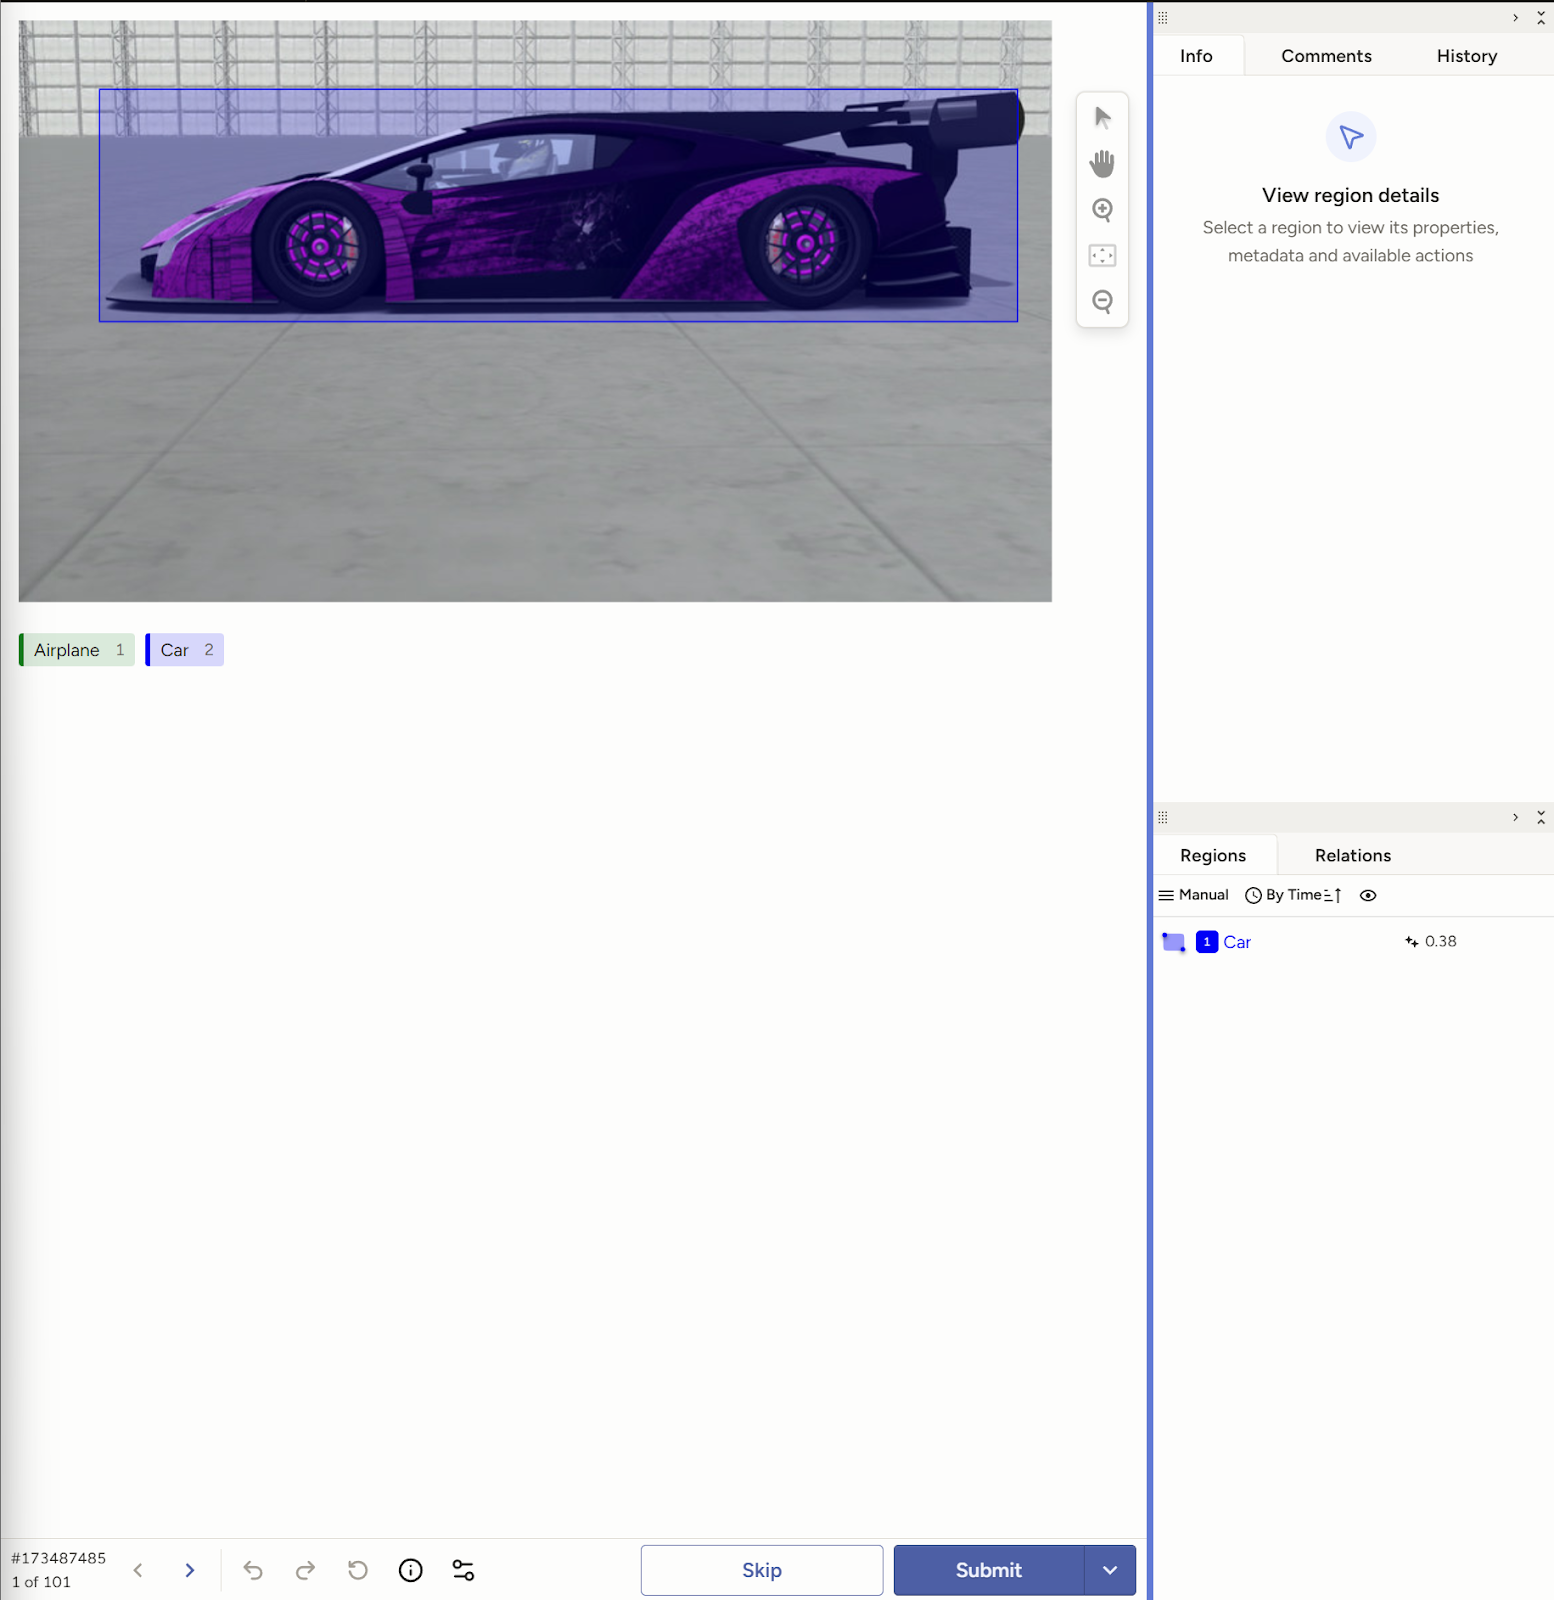
Follow the protocol given to you by your lead. In this example, the annotator is selecting the car in the image. It’s possible that your project has been configured to allow a pop up of the annotation instructions, right in Label Studio. If this is true, you can see it by clicking on the circle with an i inside of it icon on the bottom of the annotation screen, to the left of the Submit button.
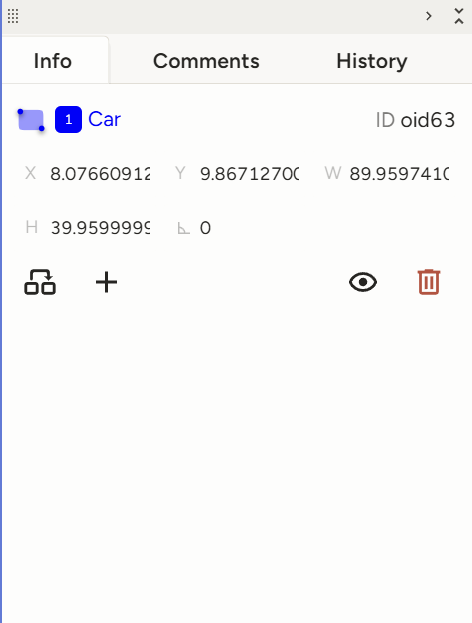
Add or edit information in the side bar under the “Info”tab. You can also leave comments for your Reviewer or team leads in the “Comments” tab..
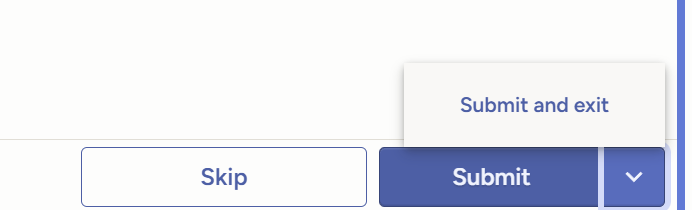
After completing the flow of your task, click the “Submit” button to send your task in and progress to your next task.
There is also a right-hand dropdown on the button that allows you to submit the task and then exit out of the project. However, to avoid accidental unfinished drafts, please reserve this option for only when you have completed the task and are exiting the project.
How can I Review my Annotation Stats?
Click on the hamburger menu button at the top of the LSE platform.
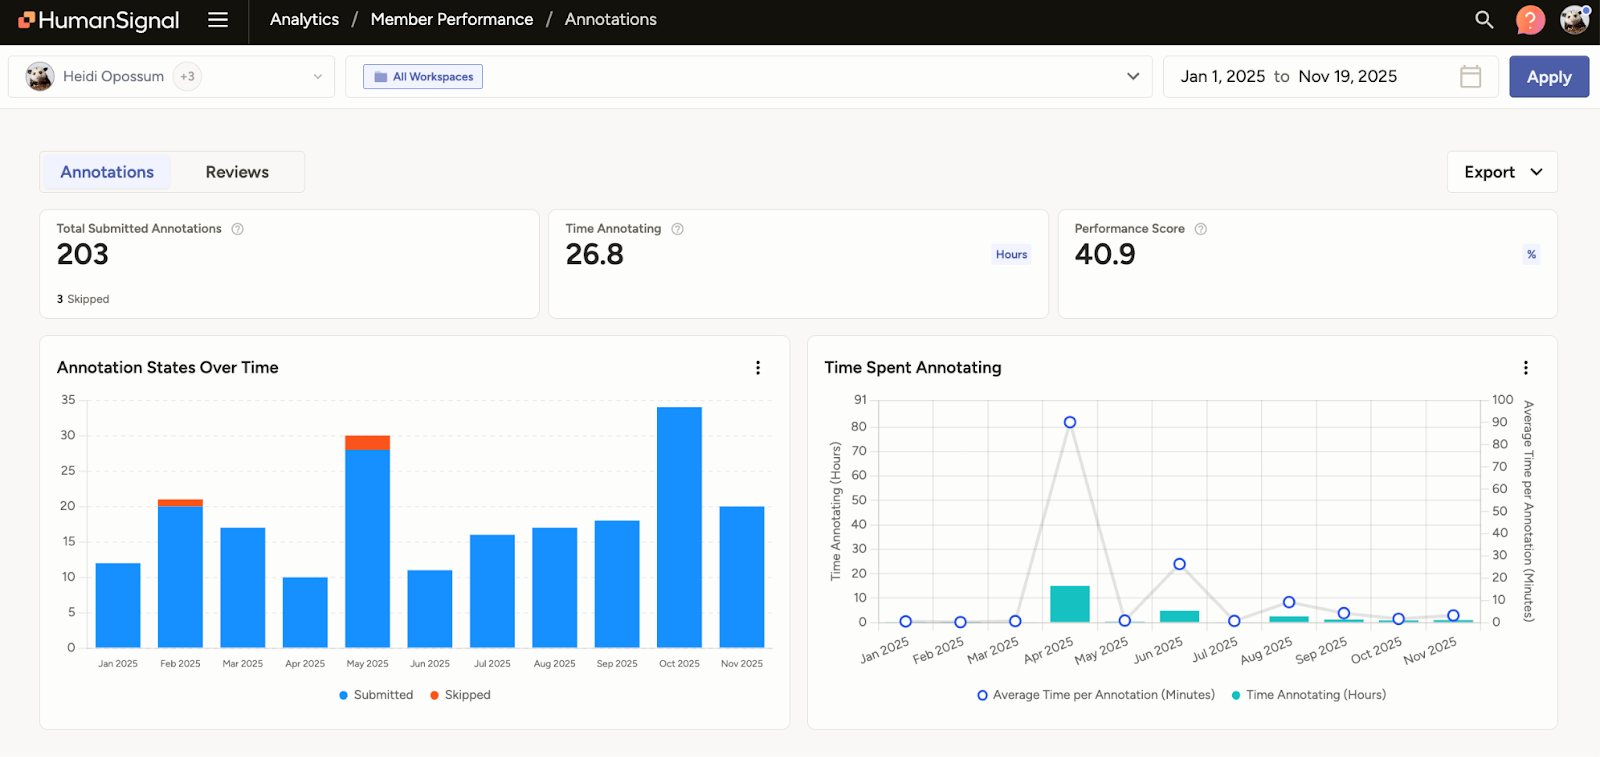
Click Analytics.
Your overall stats would be included in this dashboard. You can see your total submitted annotations, time spent annotating, and overall performance score. The graphs also provide a good visual of your production flow over time. If you want to adjust your date range, you can do so on the upper right-hand corner of the analytics dashboard.
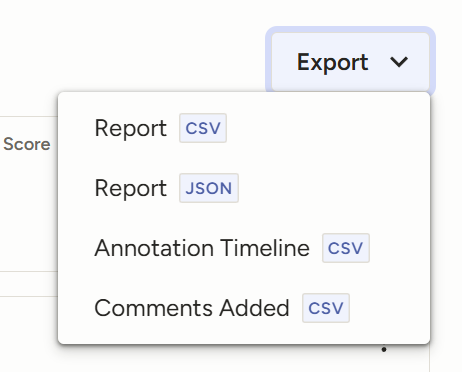
If you choose, you can also export your analytics for your own records.
Annotator Best Practices
Keep your project protocols on the side for easy reference
Keep your project protocols nearby for easy reference.
Whether you print them out or keep them open on a second screen, having a “cheat sheet” of project steps and key notes is useful for both newcomers and experienced annotators.
For those starting out, this makes it easier to follow the correct steps—especially when the workflow is nuanced or easy to misinterpret.
For more experienced annotators, it reduces the need to flip back and forth when a detail is forgotten and helps preserve mental bandwidth during challenging tasks or longer shifts.
Research every minute detail, even ones that “sound right”
Especially for tasks with lengthy or nuanced responses, models may hallucinate. Pre-annotations, or model derived answers, that seem accurate to a layperson may contain even small errors. As datasets become more complex, annotators should likewise be more meticulous. Inaccuracies may be amplified if a model trains on it, causing major setbacks to the models as a whole.
Proactively check analytics
Project standards should be announced during your onboarding. In the case of pivots, expectations also need to be adjusted. During these instances, your team lead or project’s point of contact would normally convey how many tasks should be done during an allotted period of time, the average time to be spent on each task, target vs average grading per task, and more.
Keep an eye out for these stats as they would allow you to self-monitor success rate and gauge where you may stand, in terms of project ideals. Additionally, recognizing where you may be falling short would inform you on where to improve.
Pace yourself
Empowered by your stats, make sure you keep cadence to meet the “ideal” analytics. Treat your time and energy as a non-renewable resource. Mental exhaustion and the urge to rush to complete a task both can contribute to an increase in mistakes.
When possible, tackle the hardest/longest tasks at the beginning of the day
Some projects allow you to review your assigned tasks prior to working on them. If so, consider focusing your energy on the ones that take the most time and energy when you begin your work. This would allow you to more easily focus on complex tasks when you have less mental fatigue, resulting in potentially less careless errors. Of course, prior to doing this, consult your team lead to ensure this is allowable within the project protocol.
Track when your productivity dips, and how to get back on track
Depending on the project, how you work may fluctuate. It may not necessarily always be the morning in which you are churning out the most annotations; it can be right after your coffee break or right before lunch. When that happens, experiment with different methods on how to get yourself back into the groove.
For some, saving “easier” tasks for these dips can be helpful, while pausing in the middle of a task for a stretch break enables others to jump right back in, quickly referring to their detailed notes to get back on track for the paused work.
Know when to flag something to a lead
If you hit a glitch, you don’t always need to message your lead immediately. First, capture a few details so they can troubleshoot quickly: what you were doing, what happened, the task ID, and a screenshot (if possible). Issues are much easier to fix when they’re clearly documented and reproducible.
The same applies to feedback and scoring. If something looks confusing or incorrect, note whether it seems like a one-time hiccup or a pattern across multiple tasks. Either way, bring it up, especially if it affects your scores or performance metrics. Recurring issues should be escalated sooner, since they may impact the whole project.
Document strategies that improve your efficiency
As you become comfortable in your project’s protocols, note what types of methods work best for you. There may be some tips that can be found in the documentation but they may not always be what is most efficient for you or for every task.
Log which research techniques or websites have been dependable for tasks you fact-check. This can serve as a “cheat sheet” you can click through, saving time from having to look for your resource each time you need it.
Build relationships with those who are more experienced or score higher than you
Whenever possible, connect with teammates who have more experience or consistently strong results. Many are happy to share practical tips that don’t always make it into project documentation.
Experienced annotators have had time to refine their workflow and improve both speed and quality. Learning their approaches can help you build your own toolkit faster.
It also helps to have trusted peers you can sanity-check with, especially if those teammates also serve as reviewers.